Nepal's national bird is the Himalayan Monal (Lophophorus impejanus), locally called the Danphe. The male is one of the most visually striking birds in the world: a rainbow of iridescent metallic colors from head to tail. If you want to draw it well, you need to know exactly which colors go where and how the bird's silhouette is shaped before you put pencil to paper. Sacramento Zoo’s species description highlights the Himalayan Monal’s brown long tail and a head crest, which is a helpful way to build that simple crest-plus-tail silhouette for beginners simplify the bird into a crest + head mass + long tail silhouette.
How to Draw Nepal’s National Bird Step by Step

Marcus Chen
13 Jun 2026
Nepal's national bird and what it actually looks like
The Himalayan Monal is a large pheasant native to the Himalayas. The Government of Nepal blank" rel="noopener noreferrer">officially declared it the national bird, and it even appears on Nepal's 1962 coat of arms alongside the rhododendron and a cow. Locally, Nepalis call it the Danphe, and it holds real cultural weight as a symbol of the country's mountain wilderness.
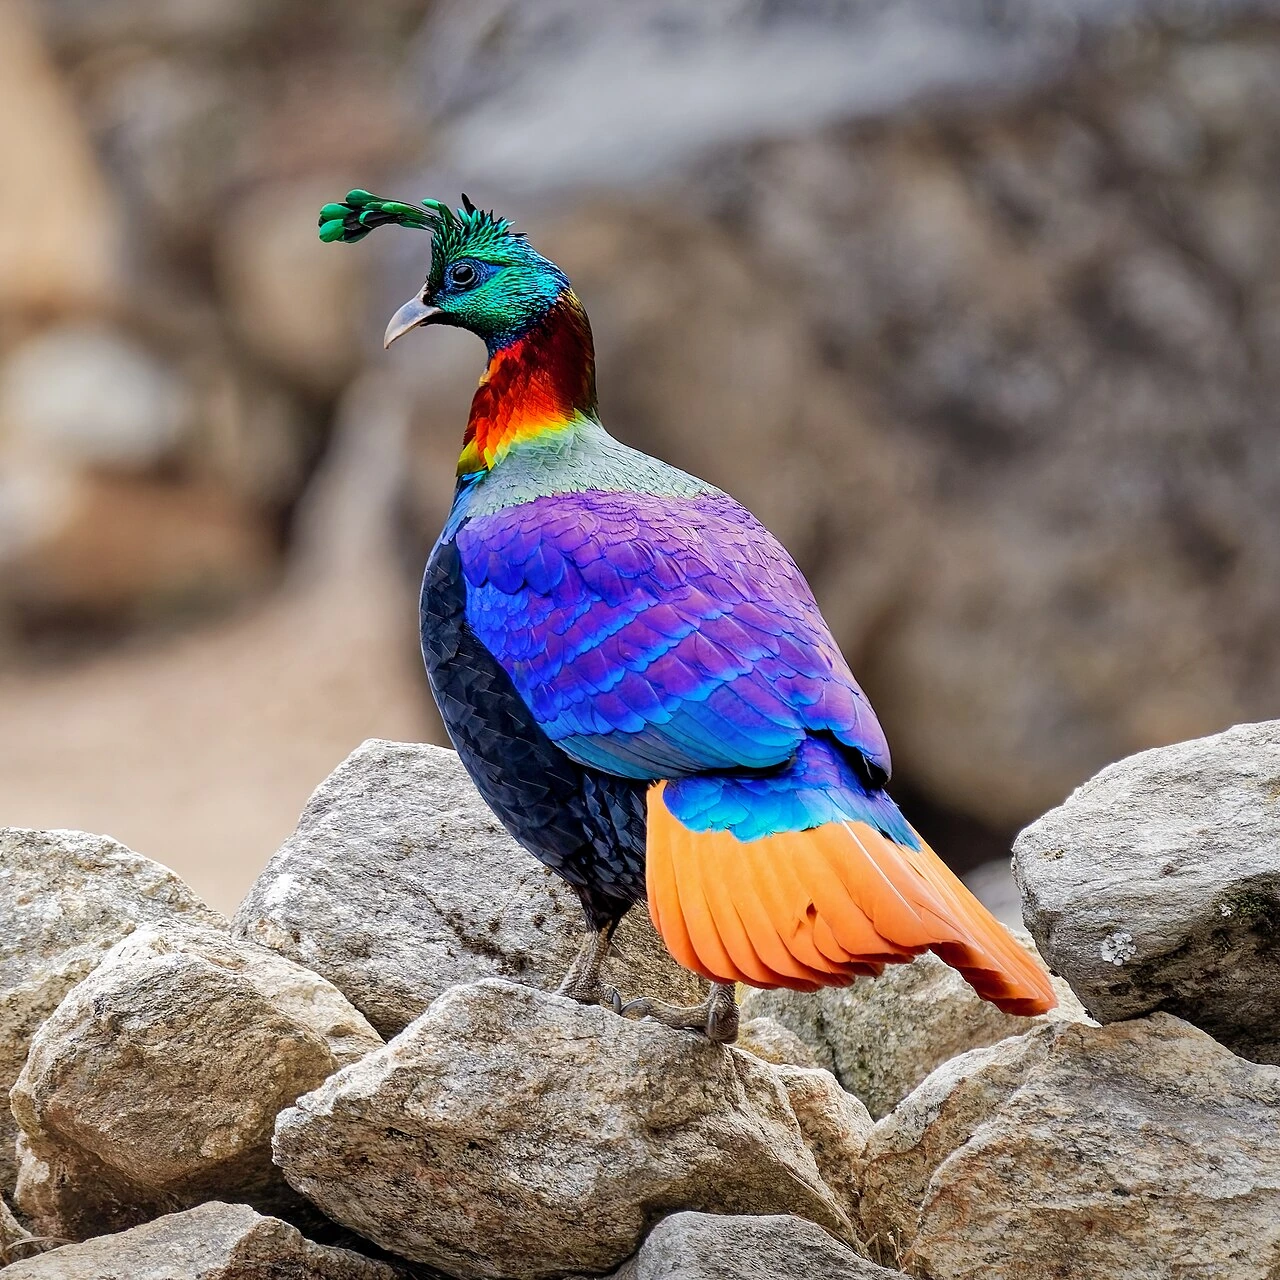
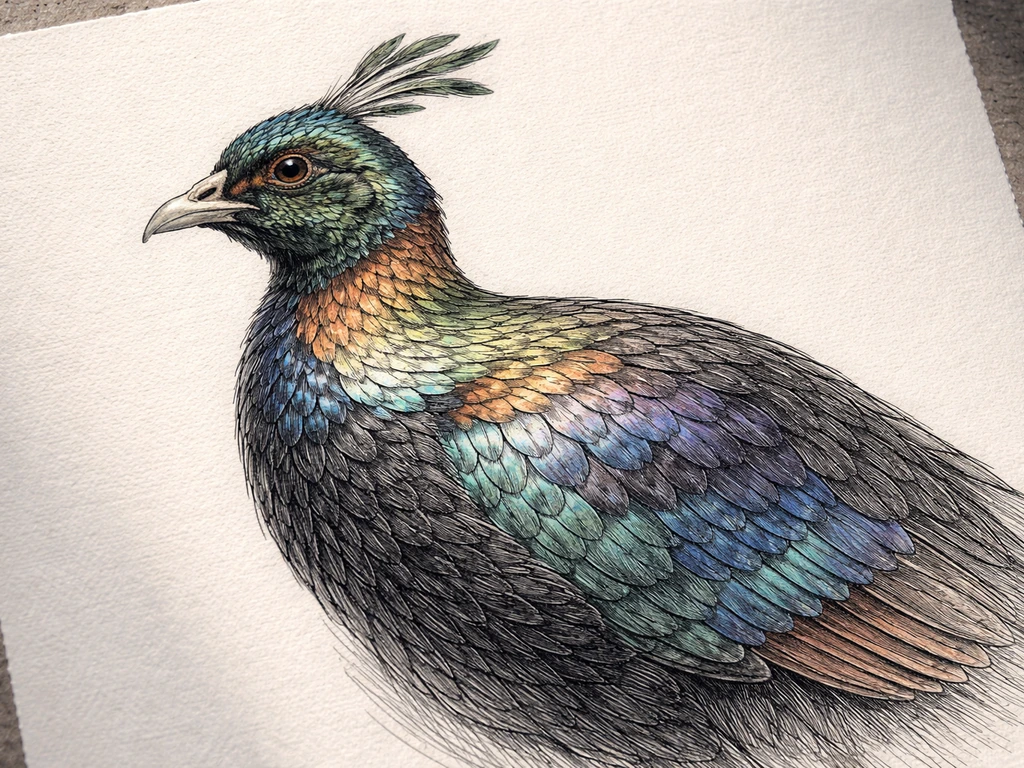
The male is the one you almost certainly want to draw. Here are its key colors and field marks in order from head to tail, because getting these right is the whole challenge:
- Head and throat: metallic green, topped by a long upright crest of wire-like, spatula-tipped green feathers
- Nape and neck: rich coppery-red iridescence, with a bare turquoise patch of skin around the eye
- Mantle (upper back/shoulders): green-gold sheen
- Wings: deep purplish-blue
- Lower back/rump: a large, bright white patch — one of the most visible field marks
- Tail: warm orangish-brown, relatively short and fanned
- Underparts: solid black from chest to belly
The female is streaked brown with a pale blue eye patch and white throat, much more muted. Unless you specifically want to draw a female, focus your study on the male's color map above.
Get the right reference before you start
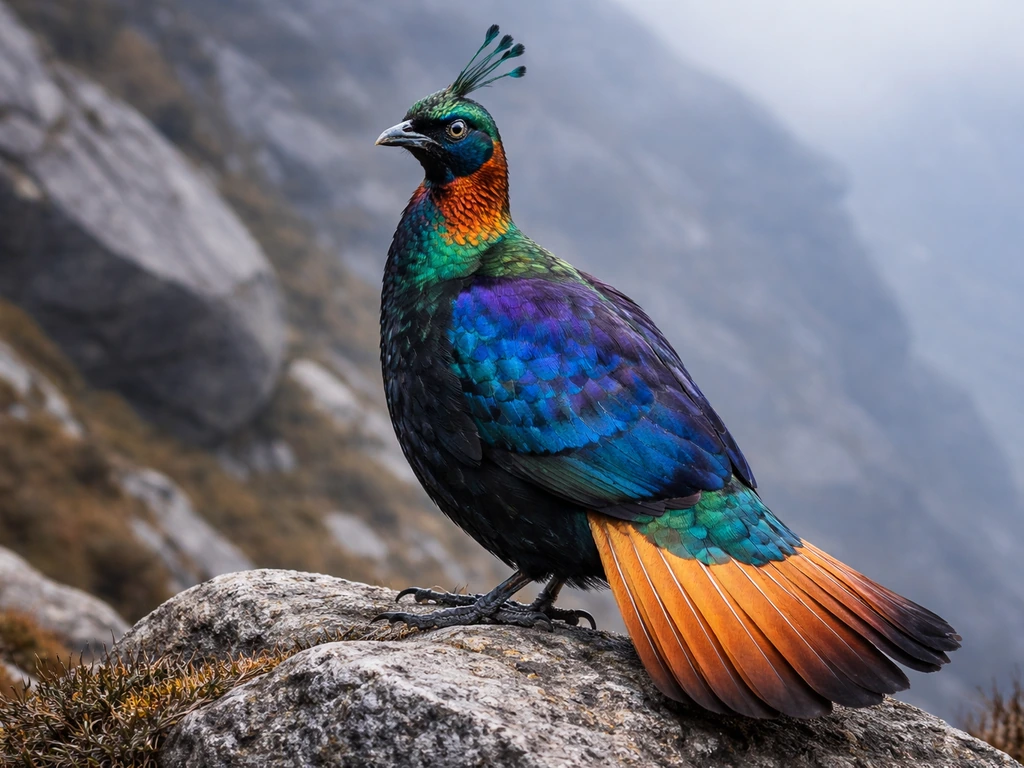
The single biggest mistake beginners make is trying to draw from memory or from one low-quality photo. For the Himalayan Monal, you need at least two reference images: one showing the bird in a clean side profile so you can read the silhouette and color zones, and one showing the head from a slight angle so you can see the crest structure and the eye placement.
Wikimedia Commons has a large browsable photo set for Lophophorus impejanus with images from multiple angles, including standing and perched poses. eBird's species page also has good quality photos. Before you draw a single line, spend five minutes just studying the images and answering these questions for yourself:
- How long is the tail relative to the body? (It is roughly equal to or slightly shorter than the body length.)
- How tall does the crest stand above the head? (It projects noticeably upward, maybe a third of the head height again.)
- Where exactly does the white rump patch sit? (It is on the lower back, just above the tail base, not on the wings.)
- How dark is the belly compared to the wings? (Belly is solid black; wings have a purplish-blue sheen that is still fairly dark.)
Print or open the reference image at a size where you can clearly see the proportions. Flipping between your drawing and your reference frequently is far more valuable than any technique tip.
Step-by-step: blocking in the main body shapes
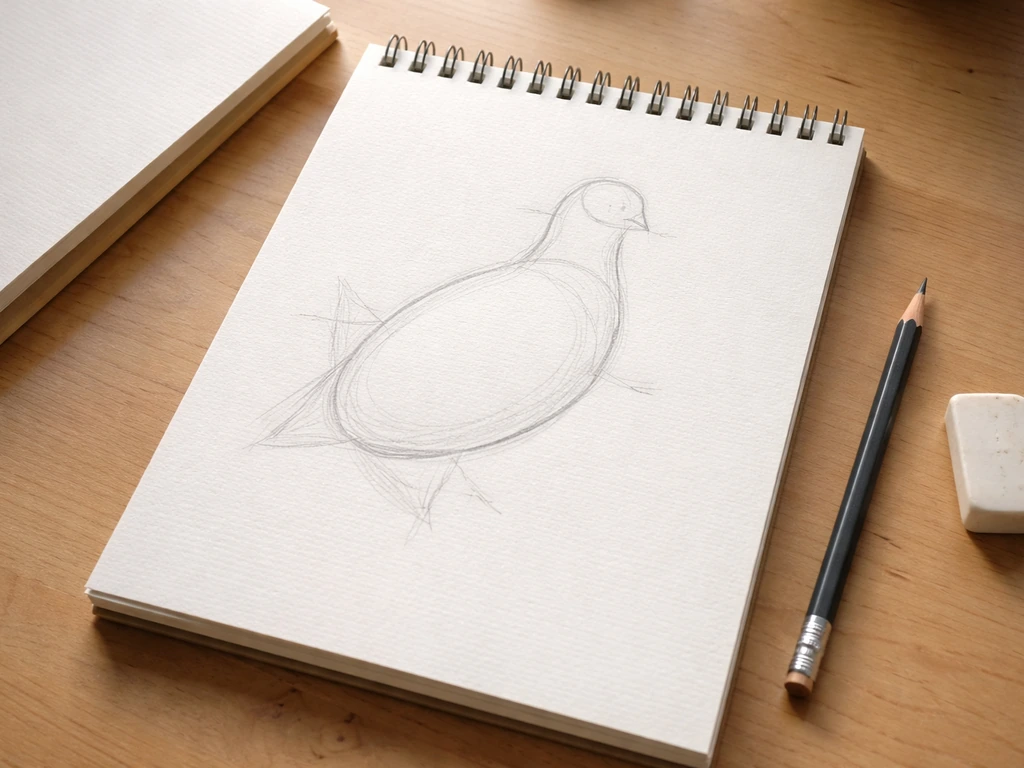
Start with large simple shapes. Do not touch feather detail yet. The goal here is to get the proportions and posture right, because fixing them at this stage takes five seconds. Once you have your references and proportions figured out, you can follow the steps below to learn how to draw a national bird with confidence how to draw national bird. Fixing them after you have added detail takes five minutes of erasing.
- Draw a large oval for the body, tilted slightly (the front/chest end sits a little higher than the tail end for a standing bird).
- Draw a smaller circle for the head, attached to the upper-front of the body oval. The head should be noticeably smaller — roughly a quarter of the body oval's size.
- Draw a short, slightly curved neck connecting the two shapes. The Monal has a fairly thick neck.
- Sketch a rough rectangle or wedge shape extending from the rear of the body oval for the tail. The tail fans out gently, so make it slightly wider at the tip than at the base.
- Add two short lines from the bottom of the body oval to indicate where the legs will be. They should sit roughly under the center of the body, maybe slightly forward.
- Now draw a thin upward spike from the top of the head circle to represent the crest. Keep it simple at this stage — just a single curved line pointing upward and slightly forward.
At this point, step back and compare the overall silhouette to your reference. Is the head the right size? Is the tail the right length? Is the body oval sitting at roughly the right angle? Fix anything that is off before moving forward. This basic check is the most valuable thing you can do.
Detailing the head, beak, wings, and tail
Head and beak
The Monal's beak is strong and slightly down-curved, typical of a pheasant that forages by digging. Draw it as two short wedge shapes: a slightly longer upper mandible that curves gently downward at the tip, and a shorter lower mandible. The beak attaches at roughly the midpoint of the head circle. The eye sits just above and behind the beak attachment, and it should have a visible oval or teardrop of bare turquoise skin surrounding it, this is a key identifying mark, so do not skip it.
For the crest, replace your single guide line with several individual wire-like feathers. Each one is thin, curves upward, and ends in a small rounded or spatula-shaped tip. Draw four to eight of them, fanning out slightly from the crown. They should feel like a spray of curved pins, not a single solid plume.
Wings
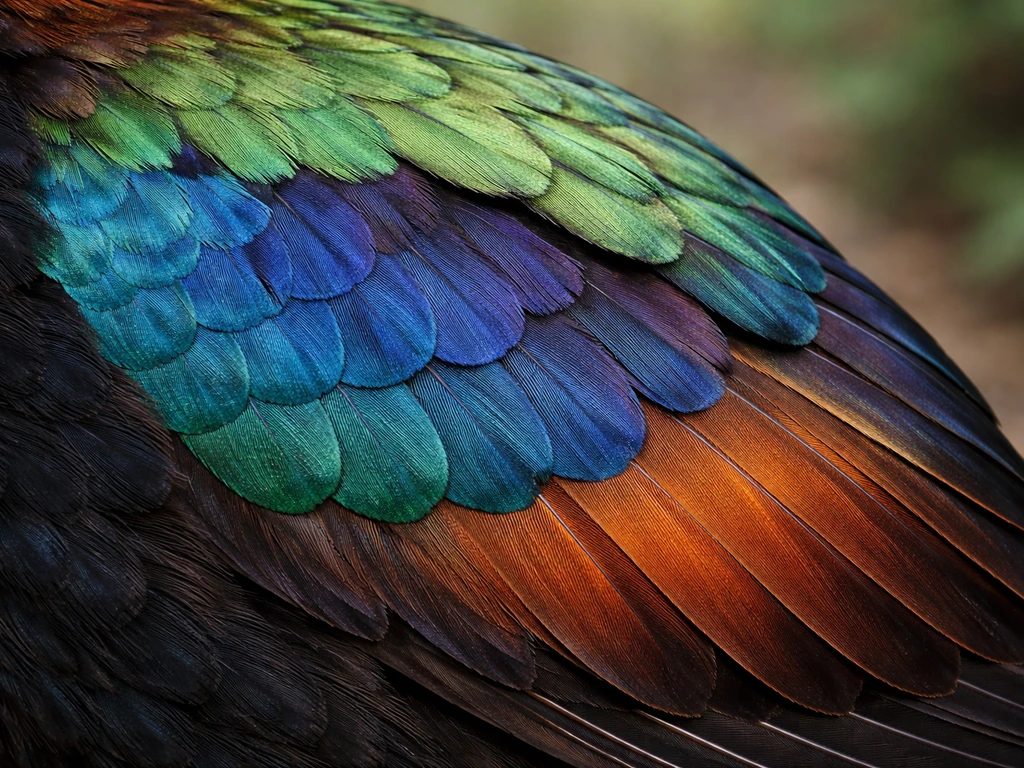
A standing Monal holds its wings folded against the body. This means you are seeing the wing as a layered surface, not as an outstretched shape. Think of it in three layers from top to bottom: the scapular feathers (covering the upper wing and shoulder area), the secondary feathers (the middle layer, visible as a band of slightly longer feathers), and the primary feathers (the lowest and longest layer, whose tips just reach the top of the tail).
Sketch these as three slightly curved bands or rows rather than trying to draw individual feathers at this stage. The common mistake here is drawing the wing as a flat shape glued to the body with no sense of layering or depth, those three bands prevent that.
Tail
The tail feathers (rectrices) fan out from the base. Draw them as individual overlapping blades, wider in the middle of the fan and narrower at the edges. The Monal's tail is relatively short for a pheasant, so keep it proportionate. A useful display pose to consider is the male with his tail held slightly raised and fanned, this makes the tail shape clearer and the white rump more visible, which produces a more dynamic drawing.
Legs and feet
The legs are sturdy and relatively short. Draw them as two bent lines with a knee joint visible on each, ending in three forward-facing toes and one small backward-facing toe. The Monal is a ground-foraging bird, so it looks natural standing on a rocky surface or a branch.
Adding texture, shading, and color
Whether you are working in pencil, ink, or color, the approach is the same: establish your value zones first, then add texture. Do not jump straight into hatching every feather before you have decided where the light and shadow areas fall.
Set up a single light source, typically coming from the upper left or upper right. Lightly block in the shadow areas with a wide, soft pencil stroke before committing to any texture detail. The underside of the body and the area under the wing layers will be the darkest zones. The white rump will be the lightest area, so leave it nearly bare of shading.
For feather texture, use short directional strokes that follow the direction each feather grows. On the head, strokes should radiate slightly outward from the eye. On the body, they run from front to back and slightly downward. Vary the spacing: closer strokes create darker areas, wider spacing reads as lighter or more reflective. This is especially important for conveying the iridescent look of the Monal's plumage, which does not have a flat matte surface.
Color plan for the male (pencil, watercolor, or colored pencil)
| Body zone | Colors to use |
|---|---|
| Head and crest | Metallic green (dark teal base with bright green highlights) |
| Eye patch | Bare turquoise/teal — leave as a simple flat oval |
| Nape and neck | Coppery red-orange, darkening toward the mantle |
| Mantle/shoulders | Green-gold, lightest on the surface facing upward |
| Wings | Deep purple-blue, darkened in shadow areas |
| Rump/lower back | White — keep this nearly un-shaded |
| Tail | Warm orange-brown, shaded toward the base and edges |
| Underparts/belly | Solid black — use your deepest values here |
If you are working in pencil only, use hatching density rather than color to differentiate the zones. The white rump should be the lightest area on the entire page. The black belly should be the darkest. Everything else falls somewhere between. Use a softer pencil (4B or 6B) for the deepest shadows and a harder pencil (HB or 2H) for the lightest texture strokes on the head and wing highlights.
Finishing touches: pose, background, and mistakes to avoid
Pose and background ideas
The Monal is a mountain bird, so it looks most natural standing on a rocky alpine outcrop, a mossy log, or a snowy ledge. A simple suggestion of rocks or light snow in the background frames the bird without competing with its complex plumage. If you want a more dynamic composition, try the display pose: tail raised and fanned, wings slightly spread, head held upright with the crest fully erect. This pose shows off every major color zone at once and makes a much more interesting drawing than a flat side profile.
Common mistakes checklist
- Head too large: The head should be clearly smaller than the body oval. If it looks equal, shrink it.
- Crest drawn as a solid blob: It is individual wire-like feathers with spatula tips, not a smooth helmet shape.
- Flat beak without curve: The upper mandible hooks slightly downward at the tip. A straight beak looks like a different bird entirely.
- White rump placed on the wing instead of the lower back: The rump patch sits right above the tail base, not on the folded wing surface.
- Wings drawn as flat shapes with no layering: Add the three feather bands (scapulars, secondaries, primaries) to give the wing depth.
- Over-shading the iridescent areas: Too much heavy shading turns the metallic zones into flat dark blobs. Keep highlight areas open.
- Under-shading the belly: The black underparts should be your deepest, densest values. Leaving them too light makes the bird look washed out.
- Forgetting the turquoise eye patch: This is a real identifying mark of the species. A small bare oval of blue-green skin around the eye is easy to add and makes the face read correctly.
Why this bird is worth drawing carefully
The Himalayan Monal's vivid iridescent plumage is not just beautiful for its own sake. In nature, that kind of brilliant coloration signals fitness and strength, which is exactly why these colors are so compelling as national symbolism. When Nepal placed the Danphe on its coat of arms, it chose a bird that carries genuine visual power.
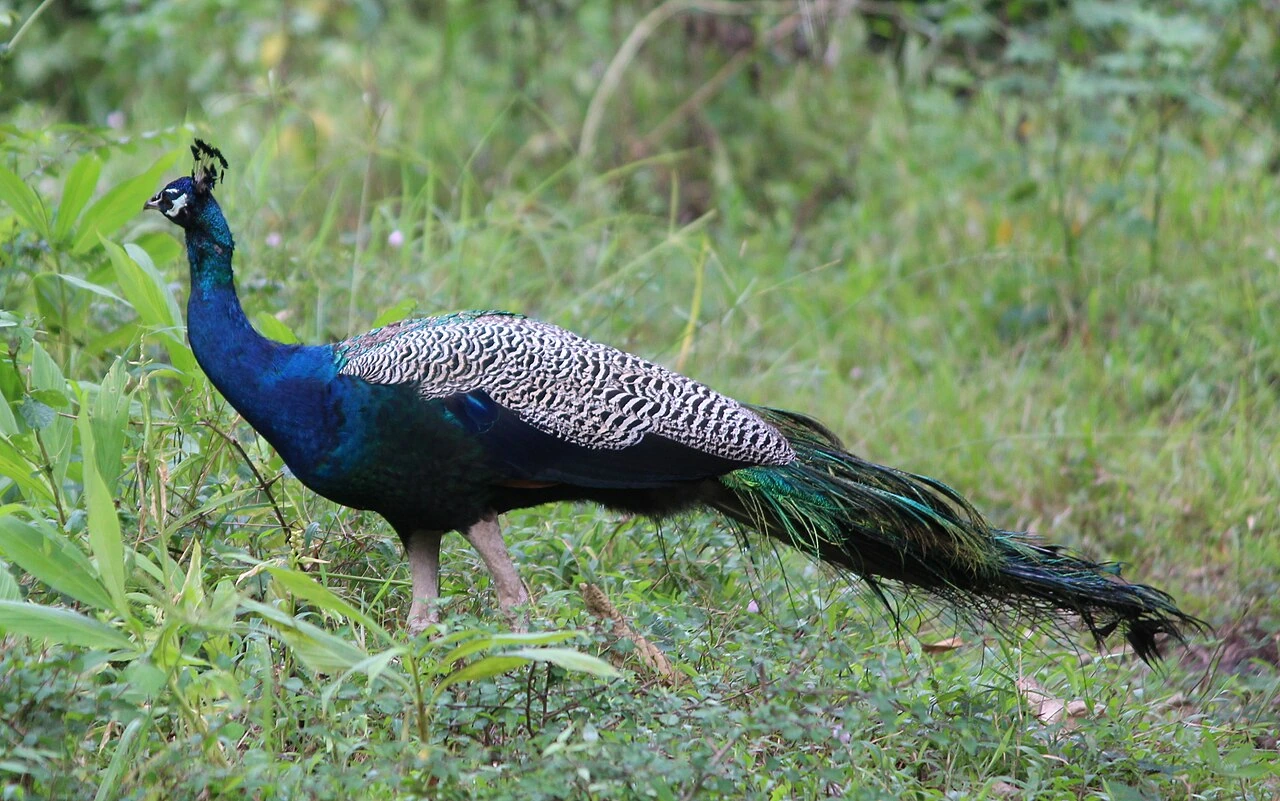
Getting the drawing right means capturing that specific combination of colors and proportions that makes the Monal unlike any other pheasant, and unlike the national birds of neighboring countries like India's peacock or Pakistan's Chakor. If you are also drawing India's national bird, you can apply similar steps for shapes, feathering, and color zones India's peacock. Jammu and Kashmir has its own official national bird as well national birds of neighboring countries.
The national bird of West Bengal is also a key symbol people recognize in the region. This is why the Chakor is recognized as a national bird in Pakistan. Pakistan's national bird is the Chakor (from the region's historical symbolism), and it's a different species from Nepal's Danphe Pakistan's Chakor. If you are also curious about India, its national bird is the Indian peacock India's peacock.
The precision matters because the bird's identity is in the details: the crest, the white rump, the turquoise eye, the black belly. Nail those, and you have drawn Nepal's national bird.
FAQ
Can I draw the Danphe (Himalayan Monal) from one single photo instead of multiple references?
You can, but expect more proportion errors. If you only have one image, choose the clearest side profile you can find, then rotate your mental model for the crest and wing layering (crest is highest point on the head, wings read as three stacked bands). If the photo is at a strong angle, use it only for color zones, and prioritize silhouette accuracy from a second source if possible.
How do I make the iridescent colors look right without using full color paints?
Use the light-shadow plan first, then mimic iridescence with value changes. Keep the white rump near untouched, push the belly shadows to be the darkest, and use directional pencil strokes with tighter spacing where the plumage should look denser. Even in grayscale, iridescence reads through sharp value boundaries and smooth gradients, not through heavy feather-by-feather outlines.
What should I do if my wing looks flat, even after using three bands?
Add thickness at the edges of each band. Darken the underside band slightly more than you think, and lighten the top edge where it catches the light. Also, keep the wing bands slightly curved, matching the body’s oval, so the wing feels like it wraps around the torso rather than sitting on top.
Where exactly should the turquoise eye skin be placed so the head looks like a Monal?
Place it so it surrounds the eye area and sits slightly above and behind the beak attachment point. If your eye looks too far forward, your beak will feel misattached. A quick check is to draw a small oval bare-skin shape first, then build the eye and beak forms around it, not the other way around.
How many crest feathers should I draw, and how do I prevent them from turning into one solid tuft?
Aim for about 4 to 8 individual wire-like feathers. Keep each one separated with visible gaps and draw them as curved lines that end in rounded or spatula-like tips. Avoid filling the crown area solidly, the crest should fan out and feel airy, like a spray of thin pins.
Should I draw the beak as sharp or rounded, and how do I handle the curve?
Draw the beak as two wedge shapes (upper mandible slightly longer) with a gentle down-curved tip. If you make the beak too pointy, it will look more like a songbird. If it curves too much, the head profile will shift, so keep the bend subtle and let the head silhouette do most of the shaping.
What’s the easiest way to get feather texture without overworking the drawing?
Work in zones. First block values (shadows, midtones, highlights), then add texture only where you have a value boundary to support it. Use short directional strokes that follow feather growth, and stop once the main zones read clearly. If everything gets the same intensity of strokes, the plumage stops looking layered.
How can I draw the tail correctly if I’m unsure about proportions?
Use the base of the tail as your anchor point, then keep the tail relatively short for a pheasant. If you draw it too long, the body will look stretched. For shape, overlap individual tail blades as a fan, wider in the middle and narrower at the edges, and consider a pose where the tail is slightly raised so the white rump is visible.
What should the legs and toes look like in a natural stance?
Keep them sturdy and relatively short, with a visible knee joint on each leg. Draw three forward-facing toes and one smaller backward-facing toe, and angle them so they support the ground-foraging look. Legs often become a common issue if toes are too spread or too straight, slight bends make the stance believable.
Do I need to include a background, and how do I avoid stealing focus from the plumage?
Keep it simple. A small cluster of rocks or a light snowy ledge works well, but avoid dark, detailed textures that compete with the crest, turquoise eye skin, and white rump. Treat the background as a soft frame, use lighter values under the bird so the plumage remains the brightest focal area.
Which viewing pose is best for beginners, side profile or display pose?
Side profile is usually easiest for beginners because silhouette and color zones align cleanly. The display pose can look stunning but it introduces more complexity at the wings and tail overlap. If you choose display pose, prioritize crest erection, tail fan shape, and the value contrast between black belly, bright rump, and the shaded underside.
What are the most common mistakes that still happen after you follow the steps?
Three frequent ones: (1) incorrect silhouette proportions (head too small, tail too long), (2) eye skin and beak attachment placed in the wrong relative position, (3) over-hatching highlights like the white rump (it should stay the lightest). Do a silhouette check before feather detail, then do a highlight check after you add texture.
Next Articles
What Is the National Bird of Jammu and Kashmir?
Find the national bird of Jammu and Kashmir, plus why it symbolizes the region and how to verify official status.
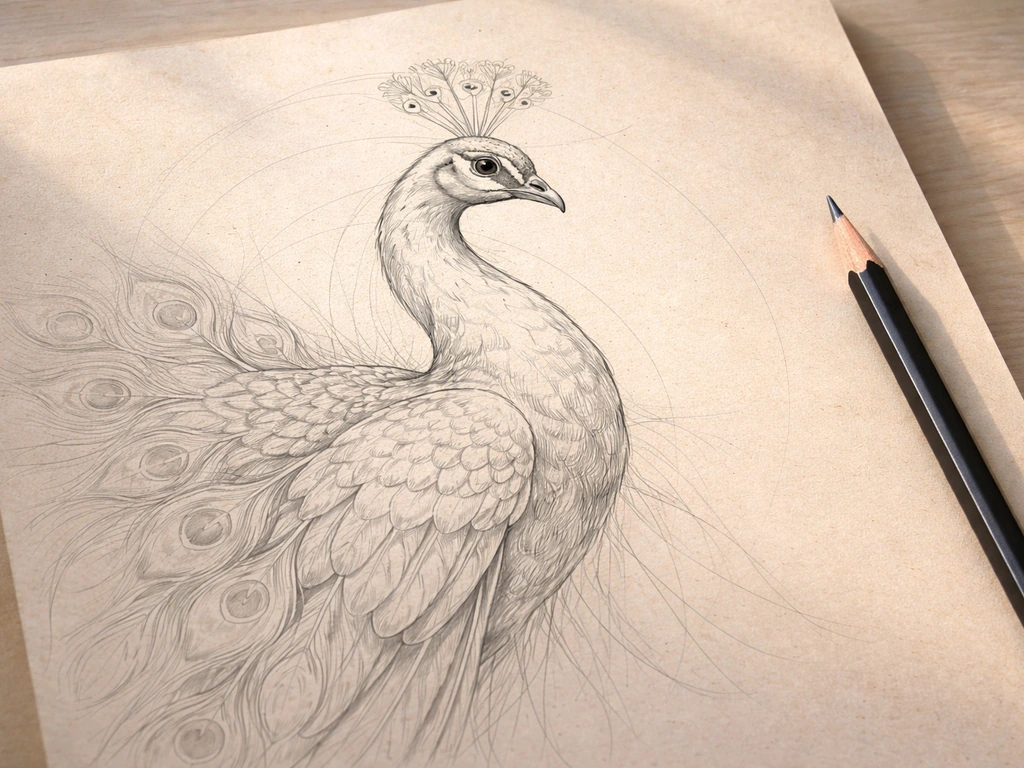
How to Draw India’s National Bird Peacock Step by Step
Learn how to draw India national bird peacock step by step with shape, feather details, tail fan pattern and shading tip
How to Draw a National Bird Step by Step for Beginners
Step-by-step guide to draw a national bird from reference, with key anatomy, clean outlines, shading tips, and symbolism