Drawing a national bird well comes down to three things: knowing exactly which bird you mean, studying its specific field marks before you pick up a pencil, and following a shape-first workflow instead of jumping straight to feathers. Once you have those locked in, any national bird, whether it's India's peacock, Nepal's Himalayan monal, Bangladesh's magpie-robin, or Pakistan's chukar, becomes a manageable drawing project even for beginners. Banglapedia states that the blank" rel="noopener noreferrer">magpie-robin (Oriental magpie-robin or doyel; Copsychus saularis) has been designated as the national bird of Bangladesh. If you want a more focused guide for India specifically, see how to draw national bird of india as an adjacent option before you start your final details.
How to Draw a National Bird Step by Step for Beginners

Pick the right national bird to draw
The first real mistake people make is grabbing a random image from a search engine without confirming the official bird. Misidentifications are common, especially across South Asian countries where several birds overlap as national or state symbols. Here is a quick reference to lock in the correct bird before you start sketching.
| Country / Region | Official National Bird | Scientific Name |
|---|---|---|
| India | Indian Peacock | Pavo cristatus |
| Pakistan | Chukar Partridge | Alectoris chukar |
| Bangladesh | Oriental Magpie-Robin (Doyel) | Copsychus saularis |
| Nepal | Himalayan Monal (Danphe) | Lophophorus impejanus |
A few things worth knowing before you choose your subject. The Himalayan monal is Nepal's national bird, but it is also the state bird of Himachal Pradesh and Uttarakhand in India, so do not confuse a 'state bird' result for a 'national bird' when searching for references. Similarly, Jammu and Kashmir's UT bird is the Kalij Pheasant, not the monal. If you are drawing India's national bird, you want the Indian peacock. If you are drawing Nepal's, you want the Danphe. Getting this right upfront saves you from drawing the wrong bird entirely.
Once you have confirmed your bird, find an authoritative reference image: a field guide photo, a museum illustration, or an image from a national park or wildlife authority website. Avoid stylized clipart. You want to see the bird's actual proportions, color zones, and posture.
Quick reference for accurate bird features
Every national bird has a set of defining field marks that make it instantly recognizable. Before drawing, study these marks on your reference image and mentally note where each one sits on the body. Here are the key features for the four most-searched national birds in this region.
Indian Peacock (Pavo cristatus)
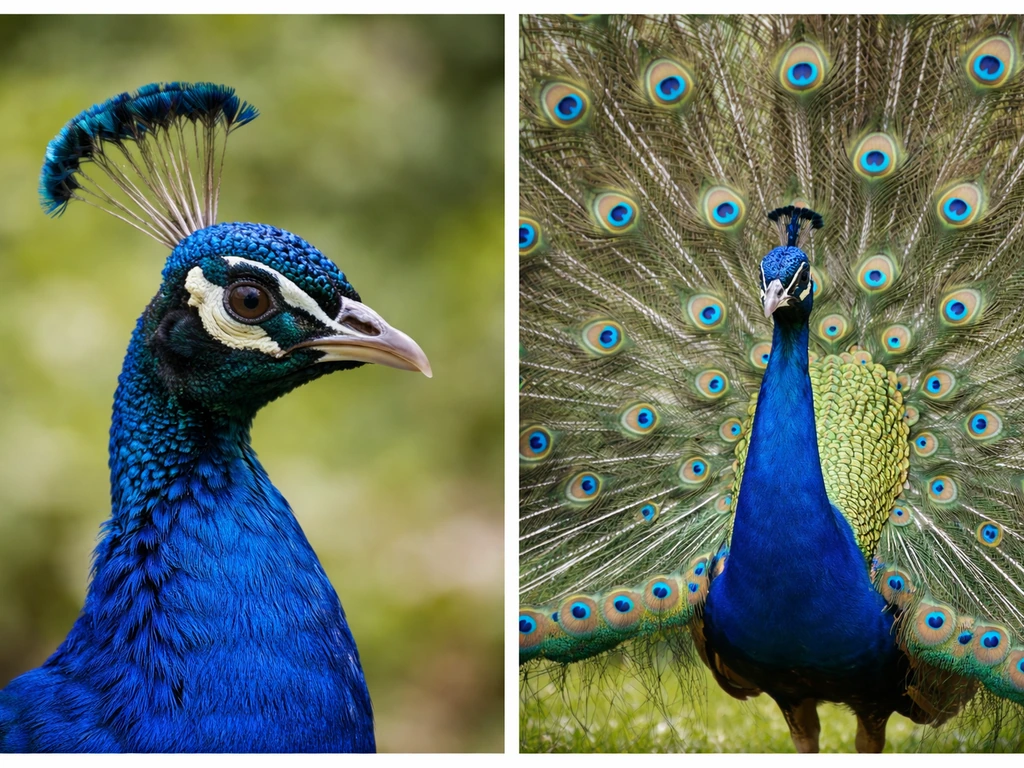
- Fan-shaped crest on the crown: a cluster of upright feather shafts tipped with small fans, not a solid spike
- Iridescent blue-green head and neck with a distinctly slender, long neck line
- White stripe above the eye and a crescent-shaped white patch below the eye on otherwise blue skin
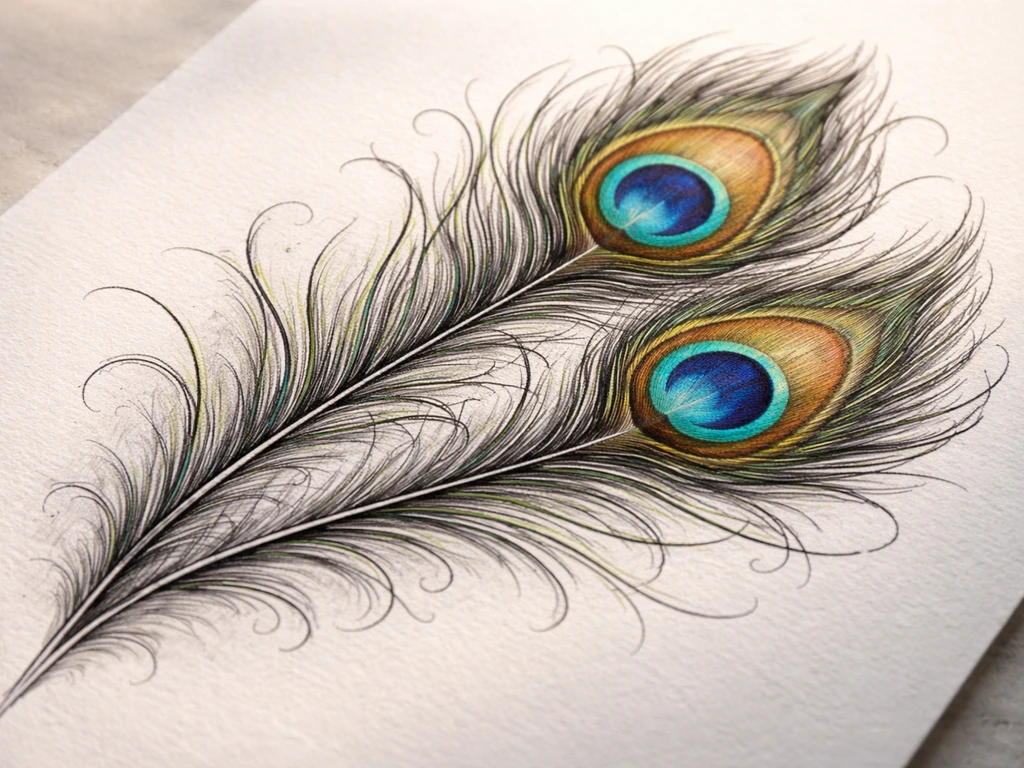
- Train (the 'tail') is actually elongated upper-tail covert feathers, each ending in an ocellus (eye-spot): treat each ocellus as a repeating unit of concentric rings, not a solid dot
- When the train is spread, the overall shape is a large fan; individual feather stems radiate from the base
Himalayan Monal / Danphe (Lophophorus impejanus)
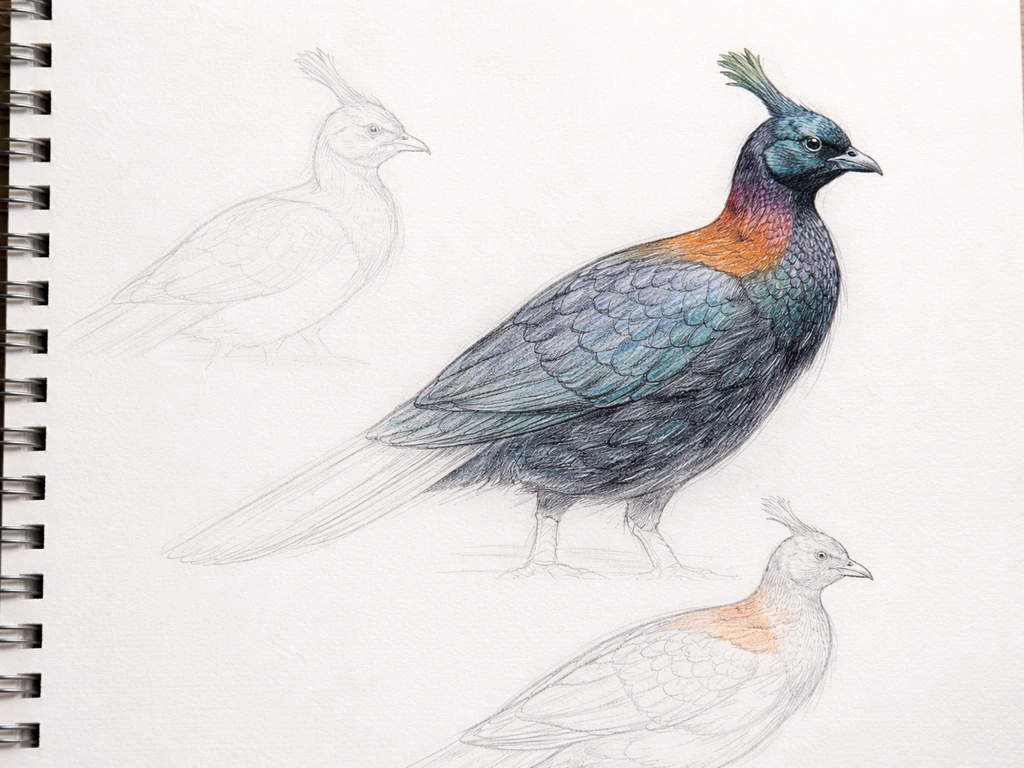
- Male: long metallic green crest drooping backward from the crown
- Coppery-orange back and neck that shifts to deep iridescent blues and greens on the body
- Prominent white rump patch, very visible in flight or when the bird is active
- Tail feathers are uniformly rufous (rusty orange-brown), darkening toward the tips
- Female is much more subdued: streaked brown overall with a barred lower tail, useful if you want to draw a female for contrast
Chukar Partridge (Alectoris chukar)
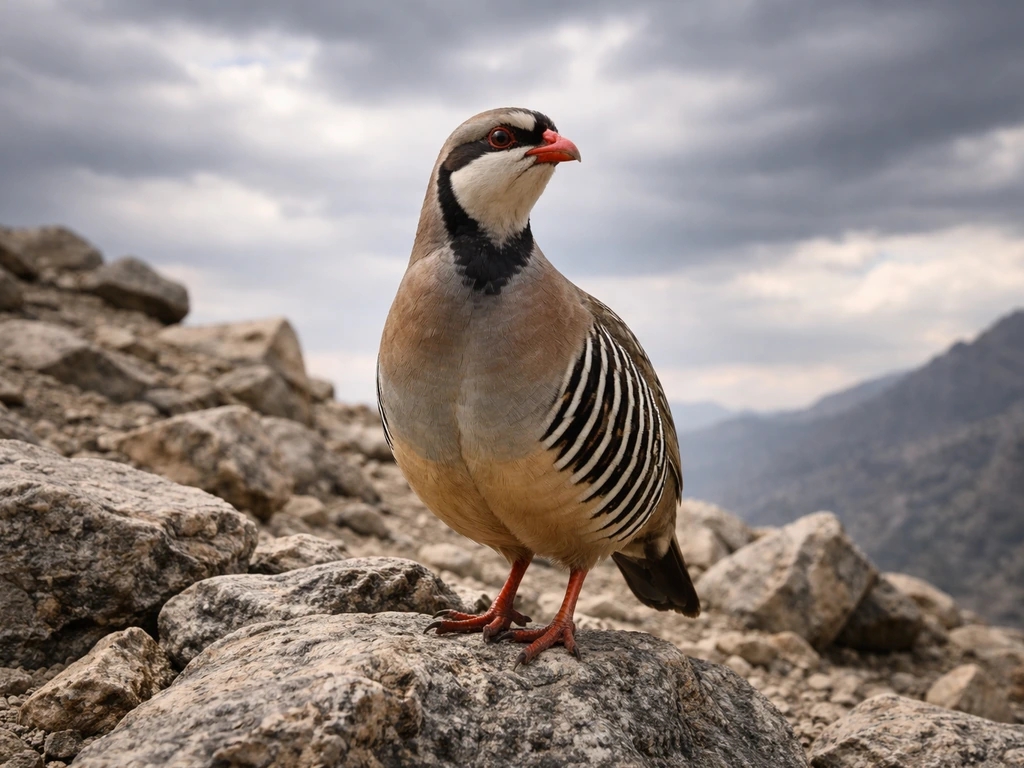
- Bold black band sweeping from the forehead, through the eye, and curving down the neck to form a closed necklace shape
- Inside the necklace: white or creamy-tan throat and cheek
- Body is sandy grayish-brown above; gray chest transitions to strong vertical black bars on the flanks
- Compact, rounded body with a relatively small head; short red bill and red legs
- In flight: broad, rounded wings and a square tail
Oriental Magpie-Robin / Doyel (Copsychus saularis)
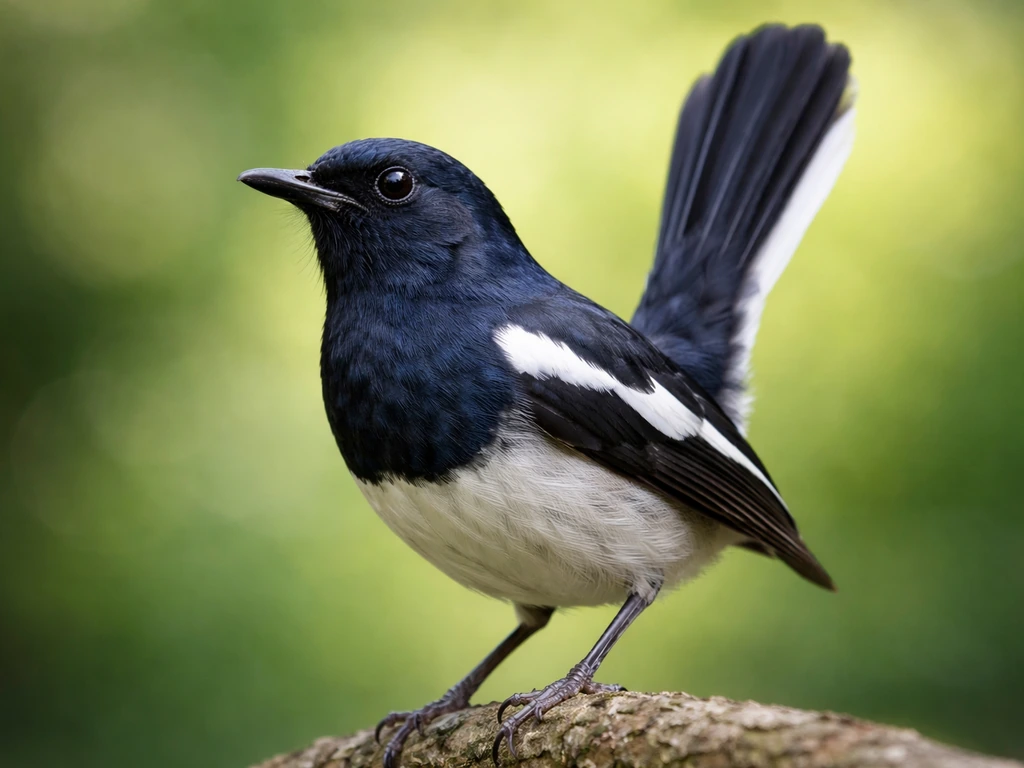
- Small, bulbul-sized bird with a long tail that is typically held upright
- Male is sharply two-toned: glossy blue-black on the head, back, wings, and upper breast; white on the lower breast, belly, and wing patches
- The tail silhouette is a distinctive identifier: long, graduated, and often cocked upward at an angle
- Slender straight bill, relatively large eye for its head size
- Female replaces black with gray, keeping the same white and two-tone pattern
Before moving to pencil, spend two or three minutes just staring at your reference image and naming these marks out loud or in writing. The national bird of West Bengal is the oriental magpie-robin, also known as the doyel reference image. That small habit makes a big difference once you start drawing from memory during the sketching phase.
Step-by-step drawing workflow (sketch to final)
The best approach, recommended by bird illustrators from David Sibley to Birds Canada's field-sketch educators, is to start with large shapes that capture proportion and posture, then work inward toward detail. Most beginners do the opposite and end up with stiff, misshapen birds because they committed to a beak or an eye before the body was right.
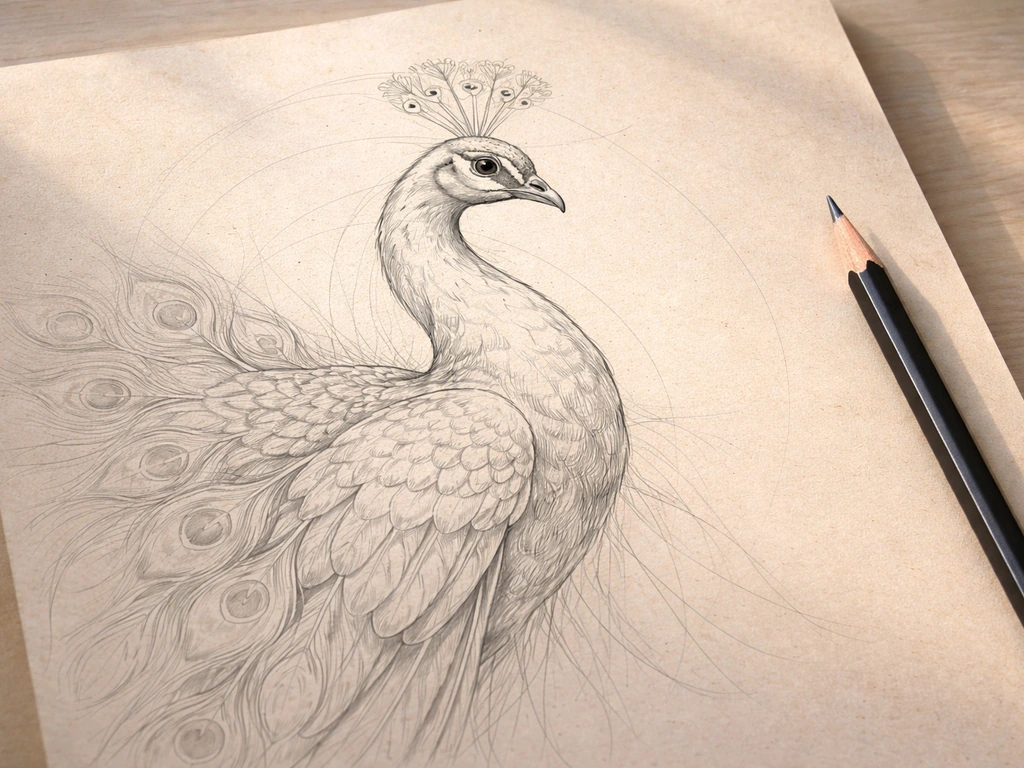
- Block the basic shapes with light pencil strokes. For most birds, this means an oval or egg shape for the body, a smaller circle for the head, and a line for the tail direction. For the peacock's spread train, add a wide fan arc behind the body oval. For the chukar's compact form, keep the body oval short and wide. Do not press hard at this stage.
- Establish proportions before anything else. Check: how large is the head relative to the body? Where does the eye sit on the head (usually about one-third down from the crown)? How long is the neck compared to the body? How far down the leg does the wing tip reach? These ratios are what make a bird recognizable even at sketch stage.
- Place the key landmark marks loosely. On the peacock, lightly indicate where the crest sits and where the white eye patches are. On the chukar, draw the arc of the black necklace band first because everything else is built around it. On the monal, indicate the crest droop and the white rump zone. On the magpie-robin, establish the tail angle early.
- Refine the outline into a cleaner silhouette. Erase the construction circles and ovals, replacing them with the actual contour of the bird. At this stage, indicate major feather groups as zones (wing coverts, flight feathers, breast, belly) rather than individual feathers.
- Add the defining markings in their correct zones. Work from large to small: fill the black zones on the magpie-robin, sketch the necklace band on the chukar, draw the crest structure on the peacock, mark the coppery zones on the monal. Keep strokes light.
- Begin shading using hatching or stippling. Hatching means drawing closely spaced parallel lines; crosshatching layers a second set at an angle on top. Tighter spacing equals darker tone. Use this to build the iridescent sheen zones on the peacock's neck and the monal's back, and the barred flank pattern on the chukar. For the magpie-robin's black zones, use smooth, dense strokes rather than hatching to get the glossy effect.
- Add feather detail last, only where it counts. On the peacock's train, draw each ocellus as a set of concentric rings with a dark center, not a filled circle. On the monal's tail, add a subtle darkening toward the tips with light parallel strokes. On the chukar's flanks, the vertical bars are crisp and evenly spaced.
- Review and fix the three most common errors: head too large or too small relative to the body, eye placed too high or too far forward on the head, and the tail direction not matching the bird's posture. Hold your drawing up next to the reference and compare silhouettes.
A common mistake with the peacock specifically is drawing the train as a solid semi-circle. The train is made of individual long feathers that each have a visible stem, and the eye-spots sit at the tip of each stem. Drawing even five or six of those stems with their ocelli, rather than a solid shape, immediately makes the drawing look accurate.
Choosing tools, paper, and practice tips
You do not need expensive materials to get good results. A standard HB pencil for initial sketching, a 2B or 4B for shading darker zones, and a clean eraser handle most of what you need. If you want to ink the final outline, a fine-tip black pen or a 0.3mm drawing pen works well. Plain cartridge paper or smooth drawing paper (at least 100gsm) is enough for pencil and ink work.
| Tool | Best Use | Beginner Tip |
|---|---|---|
| HB pencil | Initial shapes and construction lines | Keep strokes very light so they erase cleanly |
| 2B or 4B pencil | Shading feather zones and dark markings | Build tone in layers rather than pressing hard once |
| Kneaded or vinyl eraser | Lifting construction lines without smudging | Dab rather than scrub to avoid tearing the paper |
| Fine-tip black pen (0.3–0.5mm) | Finalizing outlines after pencil is confirmed correct | Let ink dry fully before erasing pencil underneath |
| Smooth drawing paper (100gsm+) | All stages | Avoid very rough paper for fine detail work like ocelli |
For practice, use timed gesture sketches. Set a timer for two minutes and draw the bird's silhouette from memory or from a reference without lifting your pencil often. This trains your eye to capture proportion and posture before detail. Do three or four of these warm-ups before your main drawing session. A grid method also helps: lightly draw a grid over your reference image and a matching grid on your paper, then copy one square at a time. This forces you to see shapes and angles rather than 'a bird.'
If you are specifically working on the Indian peacock's train or the monal's iridescent feathers, try stippling for those sections. Stippling means building tone through clusters of dots rather than lines. Denser dots create darker zones; sparser dots create lighter areas. It is slower than hatching but produces a softer, more rounded texture that suits feather sheen better.
Practice the hardest part of your chosen bird in isolation before putting it in the full drawing. For the peacock, that is the ocellus pattern. For the chukar, it is the necklace band and flank bars together. The chukar is the national bird of Pakistan, and its distinctive necklace band and flank bars are part of why it is so recognizable. For the monal, it is the crest. Sketch that one element five times on a scrap sheet before placing it in the final drawing.
Adding national-symbol meaning and final touches
The reason these birds were chosen as national symbols is not random, and reflecting that story in your drawing gives it a context and purpose beyond a technical exercise. A few details rooted in each bird's symbolic history can make your final piece genuinely meaningful.
India's peacock (Pavo cristatus) has deep roots in Hindu iconography and is associated with Lord Murugan and Lord Krishna. Its iridescent display plumage, which looks different depending on the angle and light, was a natural choice to represent a country of extraordinary diversity. When finishing your drawing, focus on rendering the peacock in full display posture with the train spread: that fanned silhouette is the image most associated with the bird as a national symbol, and it is the pose that appears on official emblems and cultural art.
Nepal's Himalayan monal, the Danphe, lives in high-altitude Himalayan forests and is closely tied to Nepal's mountain identity. If you are aiming for Nepal's national bird (the Danphe), follow a shape-first sketching workflow and focus on the crest, color zones, and the iconic upright tail posture how to draw national bird of nepal. The male's shifting iridescent colors across different body regions make it one of the most visually complex birds to draw in this part of the world. In your final version, try to differentiate the color zones clearly even in pencil: the metallic green crest and head against the coppery neck and back, with the white rump as a sharp contrast. That contrast is what makes the Danphe iconic.
Pakistan's chukar is a ground-dwelling bird associated with rugged, rocky terrain, the kind of landscape common across Pakistan's northwestern highlands. Its bold necklace marking gives it a strong graphic identity. For a final-touch detail, make sure the black necklace band is fully closed and symmetrical: that clean enclosed shape is the bird's most recognizable feature and the one that makes it stand out in any drawing.
Bangladesh's doyel (Copsychus saularis) is recognized far beyond birdwatching: it appears on currency notes, gives its name to Doel Chattar (a well-known square in Dhaka), and is embedded in everyday Bangladeshi cultural life. The bird's characteristic upright tail posture is the pose most associated with it in public imagery. When you finish your drawing, make sure the tail is angled upward and the two-tone black-and-white contrast is crisp and clean. That silhouette is what people recognize.
For any national bird drawing, consider adding a small label below your finished piece with the bird's common name, its scientific name, and the country it represents. The U.S. Fish & Wildlife Service lists the Himalayan monal as Lophophorus impejanus, which can help you confirm scientific-name accuracy on your label scientific name. It turns a sketch into a reference piece, which is very much in the spirit of documenting these birds as the cultural symbols they are. If you are working on drawings for multiple countries in this region, the Indian peacock and Nepal's Danphe make a strong visual pairing given how different their forms are, and comparing the two on the same page makes for a useful study in bird anatomy diversity.
FAQ
How do I know I picked the correct national bird before I start drawing?
Confirm the country and bird name on a reliable reference that states it explicitly as a national bird, then double-check for lookalikes or local names. A quick safeguard is to note the bird’s top 3 field marks (for example, peacock ocelli count, chukar necklace shape, doyel tail angle) before you draw any large outlines.
What’s the best way to avoid mixing up the monal with other pheasant-like birds?
When studying references, ignore the colors for a moment and map the structure first, focusing on crest height, head-to-body angle, and where the tail rises. Misidentification often happens because people copy color zones without matching posture and crest shape.
Can I use a silhouette if I cannot find a good realistic photo?
Yes, but use the silhouette only for proportions and pose, then switch to at least one additional reference for pattern placement. For birds like the peacock and chukar, the key accuracy comes from where ocelli or the necklace band sits, not just from the outer outline.
How do I draw the peacock train correctly without making it look like a solid fan?
Block in the train as separate feather stems first, then add only the ocellus at the tip of each stem. If you run out of time, draw fewer stems but keep each stem visible, with the eye-spot anchored to that stem tip.
I keep getting a stiff bird even when I use big shapes. What am I missing?
Your first shape pass needs a gesture that shows the bird’s balance point, where the weight sits, and how the neck and body curve relate. Do one quick timed sketch where you only draw the centerline and wing placement, then build shapes from that.
Should I start shading early or wait until the end?
Wait until your main shapes and proportions are correct, then shade in stages. A practical approach is: outline, then add dark zones (beak base, eye region, underwing shadows), then finish with texture like stippling for iridescent areas.
What if my bird’s colors look wrong in pencil, especially for iridescent feathers?
Don’t chase exact color, use tone bands and hard contrast cues. For the Danphe, prioritize the contrast edges between metallic green crest, coppery regions, and the sharp white rump, then treat transitions as smooth tonal shifts rather than rainbow stripes.
How do I make the doyel’s black-and-white contrast look crisp instead of muddy?
Use a light-to-dark workflow: preserve paper brightness for white areas and build black areas with controlled pressure, then refine edges with a kneaded eraser or a light eraser lift. Avoid over-blending the two zones together, because that kills the iconic two-tone look.
How can I practice the hardest element without turning it into a separate doodle?
Sketch the element, then immediately place it back into the full head or torso frame while it’s still fresh. For example, after drawing five ocellus patterns, align one ocellus tip to the correct train stem angle in your final drawing.
Do I need a grid method every time?
No. Use the grid only for your first full drawing of that specific bird, then switch to repeated gesture silhouettes for subsequent attempts. This reduces reliance on mechanical copying and improves your freehand proportion.
What materials are actually worth buying first?
Start with an HB for construction, a softer pencil (2B or 4B) for main dark areas, and a clean eraser that can lift without tearing paper. If you plan to ink, test pen thickness on a scrap first, because thin pens can make feather stems look too sharp if overused.
Is adding labels below my sketch helpful or just decorative?
It is useful if you keep it specific and consistent, write the bird’s common name plus scientific name and the country. If you’re doing multiple countries, include one line on the key field mark you focused on, like “peacock, ocelli on train tips” or “chukar, closed necklace band,” so future sketches reinforce accuracy.
Why Chakor Is the National Bird of Pakistan
Learn why chakor became Pakistan’s national bird, with folklore symbolism, history, traits, and where to spot it.